In Windows Server 2003, to enable Radius authentication Internet Authentication Service needed to be installed and configured. Now in Windows Server 2008 this has been replaced by Network Policy server.
Network Policy Server
Network Policy Server (NPS) is the Microsoft implementation of a Remote Authentication Dial-in User Service (RADIUS) server and proxy in Windows Server 2008. NPS is the replacement for Internet Authentication Service (IAS) in Windows Server 2003.
As a RADIUS server, NPS performs centralized connection authentication, authorization, and accounting for many types of network access, including wireless and virtual private network (VPN) connections. As a RADIUS proxy, NPS forwards authentication and accounting messages to other RADIUS servers. NPS also acts as a health evaluation server for Network Access Protection (NAP).
Installation
Open Initial Configuration Tasks, and click Add Roles.
Select Network Policy and Access Services, and click Next.
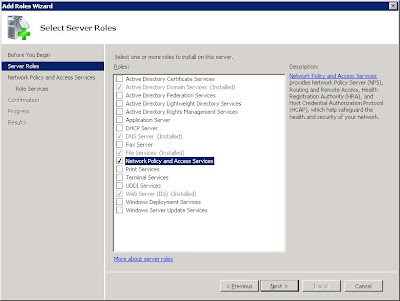 Click Next after you have read through the Introduction.
 The next screen you will be presented with is the ‘Select Role Services’. Network Policy Server needs to be selected to use any of the items. Routing and Remote Access Services is for enabling VPN termination, you may install this at the same time if you plan to run this server as a VPN server, for now it will not be installed.
Select the Host Credential Authorization Protocol, you will be prompted with a dialog box that looks a little like this:
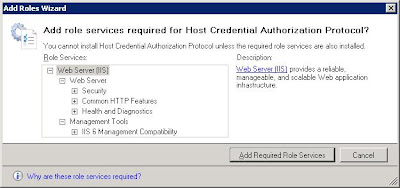
Simply click ‘Add Required Role Services’ as all of these items are required for the sub section of this role.
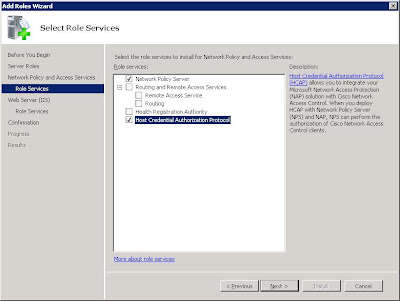 Simply click next and next until you get to the Confirmation page, triple check you have all the roles selected that are required, and click install.
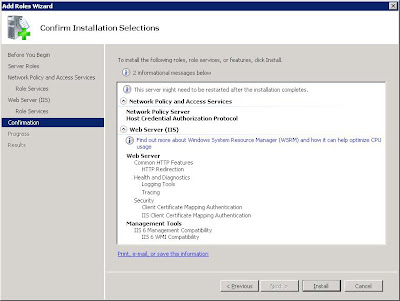
Once the NPS has been installed, and the server restarted Radius installation can begin.
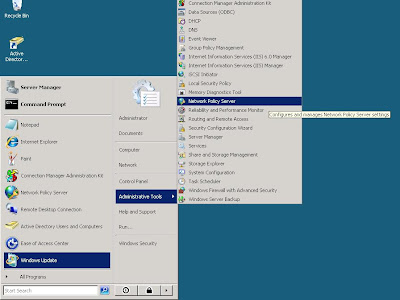
Open the Network Policy Server from Start, Administrative Tools, Network Policy Server
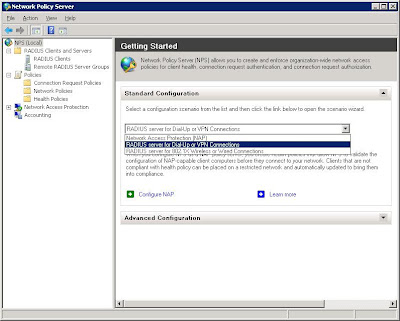
Creating the Radius policy is now made easy with the Network Access Protection wizard. Simply select RADIUS server for 802.1X Wireless or Wired Connections, and click Configure NAP.
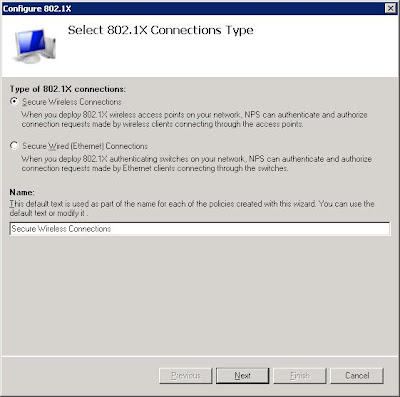 Once at this stage you will need to configure your access point as well. Each Access Point configuration varies, but you should have something like WPA2-Enterprise, once you select this you should be able to enter the IP Address of this server, and enter the secret we are about to setup. Consult your manuals or forums on locating your radius setup on your AP.
Radius works by creating a secure link between the radius server and radius client, so on the next page you must create a Radius client.
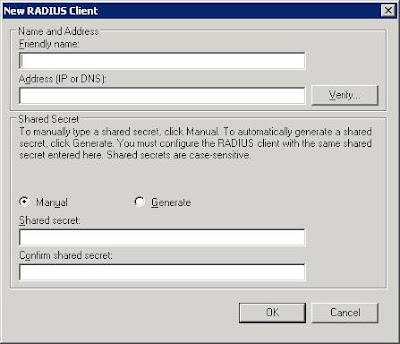
Type in a name for your client, this is purely only for the administrator as a readable name, the server uses the IP address when trying to communicate.
Pick a “secret” or password that you will enter on your Access Point, this will be how the client and server know each other and can verify the connection.
Now click next once you have created your Radius Client.
Now select Microsoft: Smart Card or other certificate, this will use any existing certificate that has been created on the server.
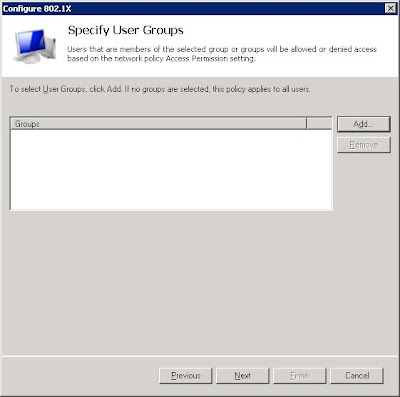
Now add the groups of users that you want to be allowed to access the radius authentication.
Now click next and finish, and you have created a Radius policy.
Depending on your Access Point, the configuration will be different.
But essentially you will have to configure Radius Authentication
So once you link your Access Point to the server, when you try to authenticate users they will be required to get a certificate. I'll outline out to request a certificate from the server in the next post.


