Monday, November 3, 2008

DHCP Scope Subinterfaces

How to get DHCP forwarding working with Cisco Router Subinterfaces
Configure subinterfaces on your Cisco Router, and ensure they each have an IP address in their subnet they will operate in.

eg,
FastEthernet 0/1.10
encapsulation dot1Q
ip address 192.168.0.1 255.255.255.0

Now we are using a Windows Server 2008 machine to handle the DHCP scopes and leases, here is what our DHCP looks like.
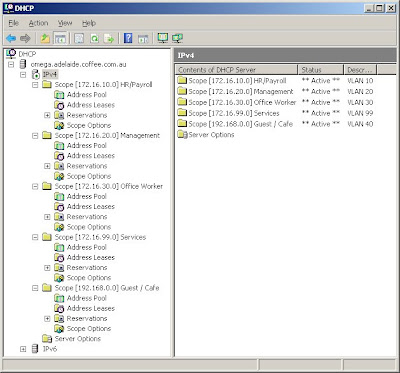

So we have created a scope, like any other scope, for the 192.168.0.0 range. Now the thing about the leases is, you will only get a lease from a range you are in, so while your pc might be in a 172. range, you will never get a lease from the 192 range, as the router passes its own subinterface ip to the dhcp server and lets it know which subnet its from.

To enable the router to pass the DHCP requests onto the Server you must put this commnd on each of your subinterfaces.

Its called 'ip helper-address " where the is the IP of your DHCP server

so enter the subinterface configuration on the router and enter that command with your DHCP server in place.

So for us, it is

Router(config-subif)# ip helper-address 172.16.99.2

This will enable the subinterface to pass DHCP (and a few other broadcast based protocols, for a full list see here: http://www.ciscopress.com/articles/article.asp?p=330807&seqNum=9 ) through the router to our DHCP server, so that your clients in their VLAN can get valid IP addresses!


Tuesday, October 14, 2008

Update time

Well, what a last few weeks its been. Lots of changes to our base setup, new computers arrived and new hardware :)

So heres the run down.

New Computers

We received 4 new machines which are all faster and newer than what we peviously got given.

They consist of:
  • IBM Thinkcentre
  • 2.8ghz Pentium 4
  • 1gb DDR-400 Ram
  • 40GB HDD
  • Intel Pro-1000 Network
These have all been installed, and replaced each of the older celeron computers.

There is still only 4 servers in total.


New Cisco Hardware

All of our Cisco hardware is now in place.

We have the following:

1x Cisco 1841 Router
1x Cisco 2950 Switch
1x Cisco 1131 Access Point

We have configured the Router for Network Address Translation so that we could implement DHCP from within our network.

So the network topology is like this:

Internet (RJ45) -> FE 0/1 Router then from Router1 FE0/0 it goes into FA0/1 on Switch1.

This is all that has been configured at this stage, so all ports on the switch are in the same VLAN and get DHCP from Omega.


Naming

So each device has been given a name.

The servers from Bottom to top are named
  • Omega
  • Swiss
  • Rolex
  • Seiko
The router has been called 'R1', The switch has been called 'S1' and finally the Access Point has been called 'AP1'. Yes very imginitive, but it makes life easier in console to have a shorter name :)

The domain that we have setup will be adelaide.coffee.com.au .

Addressing

We decided on the 172.16.x.x range for our network as it is not as widely used as 10.x.x.x and 192.168.0.x, so it makes it a little more secure.

So the following has been decided for the different subnets

HR / Payroll
  • 172.16.10.0
  • Using 172.16.10.1-30 /27
Management
  • 172.16.20.0
  • Using 172.16.20.1-30 /27
Office Workers
  • 17.16.30.0
  • Using 172.16.30.1-30 /27
Guests / Cafe Users
  • 192.168.0.0
  • Using 192.168.0.1-126 /25
Network Admins / Servers
  • 172.16.99.0
  • Using 172.16.99.1-14 /28

For the servers and devices in the Network Admins / Servers subnet we have decided on the following statically assigned IPs

  • Router (R1) - 172.16.99.1 (Mac: 00-1C-F6-33-4F-E0)
  • Omega - 172.16.99.2 (Mac: 00-0D-60-91-3A-59)
  • Swiss - 172.16.99.3 (Mac: 00-0D-60-25-1B-5B)
  • Seiko - 172.16.99.4 (Mac: 00-0D-60-91-31-EF)
  • Rolex - 172.16.99.5 (Mac: 00-0D-60-92-57-E9)
  • Switch (S1) - 172.16.99.6 (Mac: 00-0B-Be-19-6D-80)
  • Access Point (AP1) - 172.16.99.7 (Mac: 00-1D-A1-EF-13-26)
The remaining IP's in the Server subnet will be for administrator computers, which will be assigned via DHCP.


Roles

There are 4 servers to ensure the load is evenly distributed as they are not the latest and greatest systems for what we are doing.

The roles have been assigned as the following:
  • Omega - Domain Controller / Radius Authentication / VPN Terminator / DNS / DHCP
  • Swiss - Exchange 2007 / Domain Controller
  • Rolex - Website / FTP / File Server
  • Seiko - Firewall / IDS / Squid Proxy
Conclusion

So
in conclusion, we have completed quite a bit mainly on the role assigning and addressing side of things, but we have set a good grounding for the setup of the equiptment and will be implementing some of it this week!

Till next time.

Wednesday, August 6, 2008

Installation

First up we are installing Windows Server 2008 Enterprise on all systems.

Start by booting from the DVD.

On the first screen we changed the settings to:

Language: English
Time and Currency Format: English (Australian)
Keyboard or Input Method: US

Then clicked Next.

After this you are prompted with which version of Server 2008 you are installing.

We selected:

Windows Server 2008 Enterprise (Full Installation) X86

Then you click next, and agree to the license terms and clicked next.

Now as this is a fresh installation so the "upgrade" option is disabled, so you simply pick the 'Custom (Advanced)" option and continue.

The next page is your partitioning page, we have chosen to use the entire 40GB just for server 2008.

Once partitioning is complete, simply click next and go get a coffee as the windows setup will now copy the image off the DVD to the HDD as it installs Windows Server 2008.


The same method works for the Windows Vista Business client, except of course you select 'Windows Vista Business' when asked for which version you are installing.

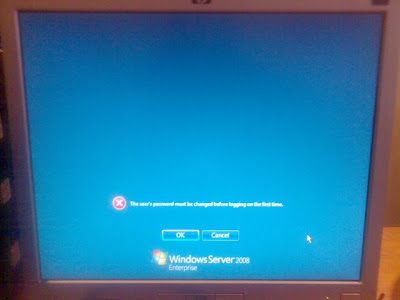
When Windows Server 2008 has completed installation you get prompted with this:


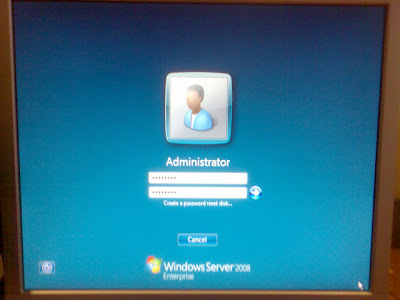
You must change the administrator password as it has not been set yet.


Once the password has been set, you have completed Windows Server 2008 installation!

Setup

So we set all our gear up and it looks like this:


On the left we have the four servers all on the KVM for easy access.

On the right we have the client on its own setup for easy access.

Inventory

So this is a list of the current pieces of hardware that we have been given for our test setup.

Windows 2008 System (x4):

IBM Netvista 6826-KMM
- 2.20ghz Intel Celeron
- 40gb IDE HDDs
- DVD-ROM
- 512mb DDR-266
- Intel 10/100 Pro Network (onboard)

Windows Vista System (x1):

Custom Built ATX Tower
- 3.4ghz Intel Pentium 4
- 80gb SATA HDD
- DVD-ROM
- 2048mb DDR-400
- 100mbit onboard network

Other hardware:
- ATEN "Master View" 4-Port KVM
- Netgear FS108 8-Port 100mbit switch
- HP L1706 17" LCD (Running on KVM)
- IBM E74 17" CRT (Running on Client)
- PS2 Keyboard and Mouse x2

To come:
- Some form of a Cisco router.


What we have been given:
- 1x RJ45 Cat5 cable which has access to the internet via it.

Welcome

Well welcome to the blog.

This is a weekly journal that I am required to complete as part of some study I am doing. So while creating this blog I hope I may be able to help some other people out there or even get comments from other IT admins for possible better methods of implementing things!

This is the blog of the implementation of a Windows 2008 Domain and Windows Vista clients.