As I needed to expand my Virtual Linux Machine's HDD as it filled up again.
I came across this useful post from Soren on askubuntu.com
http://askubuntu.com/questions/24027/how-to-resize-a-ext4-root-partition-at-runtime
(Direct Link: http://askubuntu.com/a/119458)
Thanks Soren!
Monday, February 18, 2013
Wednesday, November 14, 2012
Exchange Contact Photos GAL
So you may or may not have seen some organisations have Contact Card pictures when you browse the Exchange contact list.
They attach to the users Active Directory username and appear in a few locations, most which are seen in Outlook (Android can also use them when syncing your Exchange Email Account and Contacts).

Above: Hover Contact Card
This is done using a powershell command in the Exchange Console called Import-RecipientDataProperty
To read how to do this manually please visit this Technet Blog on GAL Photos in Exchange.
If you are interested in accelerating the process and prefer to use a GUI I have come across this very neat utility by CJWDEV called AD Photo Edit. There is a free version which allows for single imports (Which is what I use), and a paid version which allows bulk imports.

Above: AD Photo Edit Free Edition
Simply put a name into the search field and click search.

Above: Search Results
Now click on Edit Image

Above: Edit Image Window

Above: New Image selected and Resized
Now click on the OK button and the program will resize the image and upload it to the AD database for you!

Above: Confirmation the upload was successful
Now you can go back to Outlook and if you are in non-cached mode the picture will update instantly.

Above: Updated GAL Photo
Now some notes..
- Outlook Cached clients will not see the new photos until you manually update the OAB which can be done using the following PS command.
Update-OfflineAddressBook "Default Offline Address Book"
For more information on this read the section titled "GAL Photos and the Offline Address Book" on the Technet Blog
- If you want to bulk resize without relying on the AD Photo Edit program I recommend Paint.Net with the Bulk Image Processor plugin which will allow you to select all photos and resize in one go.
- If you get any errors to do with thumbnailPhoto properties, please ensure your schema has the correct properties set as per the Technet Blog
Wednesday, May 30, 2012
Windows Server Backup Error code 2155348010
Windows Server Backup is a great basic inbuilt utility to backup your Windows 2008/R2 servers.
But is also just that, as basic utility, it has some smarts, but trips itself up often if the circumstances are right.
Microsoft recommend your backup disks are 150% greater than the data you are backing up so that it can have enough space to create the number of snapshots it wants.
The problem is if you don't have that extra space and you run very close to your disk size, any large change in data will attempt to 'overfill' the disk and the fail due to error.
Now Microsoft don't recommend this solution, however it is a work around :).
Above: Windows Server Backup Disk Usage
As you can see, I have enough room for day to day changes (around 4GB on average), so WSB can recycle the space happily, however recently I moved a VHD from one disk to the other, so suddenly the incremental change was 120GB, which will never fit.
Above: Windows Server Backup Status
So suddenly I was getting failed backups with the error:
One of the backup files could not be created. Detailed error: There is not enough space on the disk.
When this happens you have three choices.
- Buy new, larger backup disks
- Reduce the amount you are backing up
- Try Delete the oldest snapshots off the backup disk.
You know how to do the first two, so lets get on to how to remove the oldest snapshots to give us some more space on the hdd.
Note: Once removed you cannot get them back, so make sure your systems are all in working order, ie do this at your own risk!
We need to start by identifying the backup disk's UID. To do this we open command prompt and run mountvol with no switches.
 C:\Users\Administrator>mountvol
 Creates, deletes, or lists a volume mount point.

 MOUNTVOL [drive:]path VolumeName
 MOUNTVOL [drive:]path /D
 MOUNTVOL [drive:]path /L
 MOUNTVOL [drive:]path /P
 MOUNTVOL /R
 MOUNTVOL /N
 MOUNTVOL /E

   path    Specifies the existing NTFS directory where the mount
         point will reside.
   VolumeName Specifies the volume name that is the target of the mount
         point.
   /D     Removes the volume mount point from the specified directory.
   /L     Lists the mounted volume name for the specified directory.
   /P     Removes the volume mount point from the specified directory,
         dismounts the volume, and makes the volume not mountable.
         You can make the volume mountable again by creating a volume
         mount point.
   /R     Removes volume mount point directories and registry settings
         for volumes that are no longer in the system.
   /N     Disables automatic mounting of new volumes.
   /E     Re-enables automatic mounting of new volumes.

 Possible values for VolumeName along with current mount points are:

   \\?\Volume{768cb7c0-93e6-11e1-811d-806e6f6e6963}\
     *** NO MOUNT POINTS ***

   \\?\Volume{19941286-93e7-11e1-9a8b-00259063b05d}\
     D:\

   \\?\Volume{0de85de0-9849-11e1-ae67-00259049b4c2}\
     *** NO MOUNT POINTS ***

   \\?\Volume{768cb7c1-93e6-11e1-811d-806e6f6e6963}\
     C:\

   \\?\Volume{768cb7c4-93e6-11e1-811d-806e6f6e6963}\
     E:\
The bottom section is what we are interested in. Most particularly the Volumes with '** NO MOUNT POINTS **, as the backup disk does not get mounted with a drive letter.
I'm not sure why, I'm sure someone could fill me in though, the System Drive is always listed twice, one with a drive letter and one without.
The disk we are looking for is the 3rd disk down, which has a UID different to the others. The information we need is the entire string:
\\?\Volume{0de85de0-9849-11e1-ae67-00259049b4c2}Now the next command is for the actual deletion of the snapshots.
For this we use a builtin utility called 'DISKSHADOW', simply type this into a command prompt to enter the utility.
Now type delete shadows OLDEST -VolID-which in the examples case would be: delete shadows OLDEST \\?\Volume{0de85de0-9849-11e1-ae67-00259049b4c2}When run you should see something similar to: DISKSHADOW> delete shadows OLDEST \\?\Volume{0de85de0-9849-11e1-ae67-00259049b4c2}
Deleting shadow copy {47c0fd32-c3e9-4c66-8481-2ac004b6d2ff} on volume \\?\Volume
{0de85de0-9849-11e1-ae67-00259049b4c2}\ from provider {b5946137-7b9f-4925-af80-5
1abd60b20d5} [Attributes: 0x00020019]...
1 shadow copy deleted.
DISKSHADOW>
Now when you look back at your Windows Server Backup:
Above: Windows Server Backup Disk Usage
You are actually able to delete all the shadow copies on the disk, so that only one copy remains if you wish. But again be certain you don't need to go back in time to retrieve this data!
So use all of this information at your own risk, but if this is what you were searching to do, that's how to you it :)
Saturday, December 3, 2011
Time Lapse Project - CHDK

Canon Hack Development Kit
Today I loaded the CHDK firmware to my SD Card.
I Located the appropriate firmware on the wiki http://chdk.wikia.com/wiki/CHDK
Followed the installation guide here: http://chdk.wikia.com/wiki/File:CHDK_Installation_Guide.pdf
Then it was finished! (I thought it would be harder than this!)
So I took the next step and located a script for running the time lapse auto shoot..
I came across another part of the wiki where users had already written scritps to perform these actions!
http://chdk.wikia.com/wiki/UBASIC/Scripts:_Ultra_Intervalometer
I tried a few different scripts, but ended up using the one below:
rem Author - Keoeeit
 rem Upgraded by Mika Tanninen
 @title Ultra Intervalometer
 @param a Delay 1st Shot (Mins)
 @default a 0
 @param b Delay 1st Shot (Secs)
 @default b 0
 @param c Number of Shots (0 inf)
 @default c 0
 @param d Interval (Minutes)
 @default d 0
 @param e Interval (Seconds)
 @default e 10
 @param f Interval (10th Seconds)
 @default f 0
 n=0
 t=(d*600+e*10+f)*100
 if c<1 then let c=0
 if t<100 then let t=100
 g=(a*60)+b
 if g<=0 then goto "interval"
 for m=1 to g
  print "Intvl Begins:", (g-m)/60; "min", (g-m)%60; "sec"
  sleep 930
  next m
 :interval
   n=n+1
   if c=0 then print "Shot", n else print "Shot", n, "of", c
   shoot
   if n=c then end
   sleep t
   goto "interval"
Then on the camera I loaded the script up, and it started shooting!
This is all too easy :)
One question I had was, how do I get the script to start as soon as the camera is turned on?
Turns out there is a feature for that in CHDK already as well!
As I was researching how to do it, I came across this persons issue where they had turned autostart on by accident!
http://www.flickr.com/groups/canonsx30/discuss/72157626084300606/
So I enabled autostart and the script... auto started!
Naturally I grabbed my gorillapod and threw it onto my window ledge and took it's very first time lapse!


Above: The camera on my Joby GorillaPod SLR Edition.
How did it turn out you ask?
See for yourself :)
(I reversed the footage, as it was more interesting watching the sunrise.... set.. so to speak :) )
Friday, December 2, 2011
Time Lapse Project
I recently stumbled across the CHDK website < http://chdk.wikia.com/wiki/CHDK > and started to get interested in just how easy it was to turn a normal Point and Shoot camera into a Time Lapse beast!
I've previously shot my time lapses with a web cam hooked up to a computer:
Then I wanted greater quality, so I purchased an Intervalometer and Power Adaptor for my Canon EOS 400D:
It got my thinking... just how far could I go with my love of Time Lapse.
To produce a good time lapse video, you require plenty of SD card space (Or hdd space), continuous power, a camera in a fixed position and.. time!
So a regular Point and Shoot camera can't really give you plenty of SD Card space or continuous power.. until I realised Canon produce Power Adaptors for some of their Point and Shoot range!
Of course, until I purchased a camera, all of this was just ideas.
Then someone posted for sale, second hand, a Canon IXUS 80 IS for $45!
I did some research and found out it was indeed compatible with the Canon AC ADAPTER KIT ACK-DC10. Half my issue solved!
Here it is, in all its used beauty :)

Now on to finding out how to load the CHDK firmware on... stay tuned.
Tuesday, May 3, 2011
Group Policy - Changing Default Search Provider in IE 7, 8 and 9
Controlling your users Internet Explorer 7, 8 and 9 Search Providers is very easy.
There are various methods of trying to change the search provider, but thanks to the new 'AntiPhishing' component of Internet Explorer 8, non-supported methods will end up with the user having a prompt when they first launch IE.
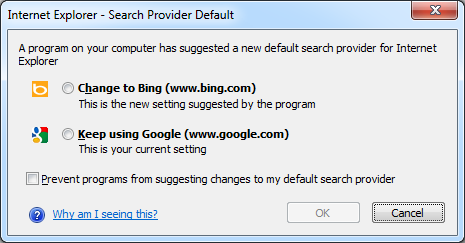 Above: Microsoft's AntiPhishing pop-up alerting the user that an unauthorized change had been made.
So the only way to control the search providers is via Group Policy. But of course Microsoft only included half of the required policies for this to be achieved out of the box.

Above: GPMC Path to the Internet Explorer Setting
When you "Enable" this feature, in the Help text it states.
Help:
 If you enable this policy setting, the user will not be able to configure the list of
search providers on their computer, and any default providers installed will not
appear (including providers installed from other applications). The only providers
that will appear will be those in the list of search provider policy keys
(found under [HKCU or HKLM\Software\policies\Microsoft\Internet Explorer\SearchScopes]).
Note: This list can be created using a custom administrative template file.
For information on creating this custom administrative template file, see the
Internet Explorer documentation on search providers.
So they have given us half the story and the rest you have to research and code yourself! Thanks MS!
Thankfully I found it to be a lot easier than I expected and found some resources with prewritten ADM files.
Simple copy and paste the next lot of code into Notepad, and save it as an ADM file. (Remember to select Save as type: All Files (*.*))
http://pastebin.com/3SaKmqkG
Remember to 'Download' it, not copy, as even PasteBin formats it incorrectly. However it is ok when you click download from pastebin.
(Thanks Nebulis01 for the PasteBin :) )
IE8SearchProviders.ADM
 ; Based on 'Group Policy Search Providers ADM File', provided by schema_mangler
 ; Posted to microsoft.public.internetexplorer.general on 17 Nov 2006, 22:52
 ; Search Google Groups for the original, and see http://support.microsoft.com/kb/918238
 ; CRGS version changes:; Tidied up unnecessary [strings]
 ; Changed Bing, Google, Yahoo, Ask to latest versions, added Search Suggestions
 ; Added Amazon UK, eBay, Wikipedia via Microsoft site
 ; Also set the Google GUID to the lowest value, so that it is default

 CLASS USER
 CATEGORY !!WindowsComponents
 CATEGORY !!InternetExplorer

 POLICY "Select search providers to be included in policy-based search list"
     #if version >= 4
     SUPPORTED !!SUPPORTED_IE7
     #endif
     EXPLAIN !!Search_Explain
     KEYNAME "Software\Policies\Microsoft\Internet Explorer\SearchScopes"
     PART "Ask Kids"
     CHECKBOX VALUENAME LiveChoice
     ACTIONLISTON
     KEYNAME "Software\Policies\Microsoft\Internet Explorer\SearchScopes\{BF9CED03-41B4-44E9-8850-87E374BEDA17}"
     VALUENAME DisplayName    VALUE "Ask Kids"
     VALUENAME URL    VALUE "http://www.askkids.com/web?q={searchTerms}&search=search&qsrc=0&o=0&l=dir"
     VALUENAME FaviconURL VALUE "http://www.askkids.com/favicon.ico"
     END ACTIONLISTON
     END PART

     PART "Bing"
     CHECKBOX VALUENAME BingChoice
     ACTIONLISTON
     KEYNAME "Software\Policies\Microsoft\Internet Explorer\SearchScopes\{A6CF48A4-CC6B-46CA-B51A-AA3B0DC46532}"
     VALUENAME DisplayName VALUE "Bing"
     VALUENAME URL VALUE "http://www.bing.com/search?q={searchTerms}&form=IE8SRC&src=IE-SearchBox"
     VALUENAME ShowSearchSuggestions VALUE NUMERIC 1
     VALUENAME SuggestionsURL VALUE "http://api.bing.com/qsml.aspx?query={searchTerms}&market={Language}&form=IE8SSC&maxwidth={ie:maxWidth}&rowheight={ie:rowHeight}§ionHeight={ie:sectionHeight}"
     VALUENAME Codepage VALUE NUMERIC 65001
     VALUENAME FaviconURL VALUE "http://www.bing.com/favicon.ico"
     END ACTIONLISTON
     END    PART

     PART "Google"
     CHECKBOX VALUENAME GoogleChoice
     ACTIONLISTON
     KEYNAME "Software\Policies\Microsoft\Internet Explorer\SearchScopes\{012E1000-F331-11DB-8314-0800200C9A66}"
     VALUENAME DisplayName     VALUE "Google"
     VALUENAME URL      VALUE "http://www.google.com/search?q={searchTerms}&sourceid=ie7&rls=com.microsoft:{language}:{referrer:source}&ie={inputEncoding?}&oe={outputEncoding?}"
     VALUENAME ShowSearchSuggestions VALUE NUMERIC 1
     VALUENAME SuggestionsURL  VALUE "http://clients5.google.com/complete/search?q={searchTerms}&client=ie8&mw={ie:maxWidth}&sh={ie:sectionHeight}&rh={ie:rowHeight}&inputencoding={inputEncoding}&outputencoding={outputEncoding}"
     VALUENAME FaviconURL  VALUE "http://www.google.com/favicon.ico"
     END ACTIONLISTON
     END    PART

     END POLICY
     END CATEGORY
     END CATEGORY

 [strings]
 SUPPORTED_IE7="At least Internet Explorer 7.0"
 WindowsComponents="Windows Components"
 InternetExplorer="Internet Explorer"
 Search_Explain="Adds registry entries to HKCU\Software\Policies\Microsoft\Internet Explorer\SearchScopes for specific search providers. Check or clear the checkbox next to each search provider.\n\n If you enable this policy setting and if the "Restrict search providers to a specific list of providers" Group Policy setting is enabled, the checked entries will be the only ones that appear in the Internet Explorer drop-down list. If the "Add a specific list of search providers to the user's search provider list" Group Policy setting is enabled, the checked entries will be added to the user's list of search providers.\n\n If you disable this policy setting or do not configure it, search will be governed by the other relevant policies in this category. See the other policies mentioned here for additional information."
If you wish to add your own search providers, its very easy, just follow the layout of the others in the file, the only speed hump you may hit is finding the ID of the search provider, if worse comes to worse, simply add it to your own local IE browser, then pull it out of your local registry.
Now that you have the ADM file, we can load it into your Group Policy editor, and enable it!
Start by adding the newly created template into your Group Policy Object.

Above: Right clicking on 'Administrative Templates' under User Configuration.

Click Add and select your ADM file.

Note: If you get an error about
Error 62 The corresponding string was not found in the [strings] section
Found: !!windowscomponents
The file can not be loaded
Ensure in the file the line that contains [strings] has NO other spaces around it, the line must only contain "[strings]" otherwise it will fail. I have noticed some of the scripts on the internet have an extra space, which seems to have been added during the upload process.

Above: GPMC with the new Classic Administrative Templates section.
Now you may note there is a section called "Classic Administrative Templates (ADM). This is where our new policy setting has been installed into.

Above: The options in the new policy object.
Now all that's left to do is enable the search providers that you would like them to access, and apply the GPO to an Organizational Unit of your choice!
Just remember this is a USER policy, so applying it to a Computer OU isn't going to do much :)
I'm yet to test this method with IE9, but as its though the correct channels there should be no reason why it wouldn't work.
Edit: I have tested with and it works fine in Internet Explorer 9.
Edit: I have tested with and it works fine in Internet Explorer 9.
Saturday, April 23, 2011
Yealink SIP-T38G SIP-T28P
 We just received our long awaited Yealink SIP-T38G IP Phone!
I'll be reviewing the latest Yealink phone very shortly, so for now, you'll just have to enjoy the box shot and read the PDF while I put together the rest of the article!
Sunday, April 17, 2011
Deploying Adobe Reader X

Just a quick post to link an amazing resource I just found for deploying Adobe Reader X.
Using the Adobe Customization Wizard X, you can edit the Adobe Reader MSI with ease, then simply deploy the setup.exe via GPO or SCCM without hassle!
To read more follow the link below.
http://blog.stealthpuppy.com/deployment/deploying-adobe-reader-x/
Tuesday, September 14, 2010
Terminal Server - 2008 R2 - Force Domain Login
So you've built your shiny new Windows Server 2008 R2 Terminal Server, virtualised it and it's all going well, except for one thing.
Every time you RDP to it, you get presented with the local login, not the domain login!
 (Above: Login screen to the Terminal Server, with a computer name of 'ORION')
So all the users have to type Domain\Username , or username@domain. Which is fine, if they are a little comptuer savvy, however forcing the Terminal Server to logon to the domain first time is much nicer!
So here are the steps to force the RDP session to open with your domain instead of the local machine as the authentication target!
First login to the TS (Terminal Server) with a user with administrative privileges.
Then open Remote Desktop Session Host Configuration:
 (Above: Launching the application from the start menu)
Once you're in, navigate to the 'RDP-Tcp' connection, located under connections.
 (Above: Remote Desktop Session Host Configuration main screen)
Now right click on RDP-TCP and select properties.
 (Above: Right click menu on 'RDP-Tcp')
Once the Properties window comes up, navigate to the "Log on Settings" tab.
 (Above: General Tab of RDP-Tcp properties window)
 (Above: Log on Settings tab of RDP-Tcp properties window)
This is the page where you can specify your domain, which will force the TS to have "log on to: domain" when the user connects via RDP.
 (Above: Filled out Log on Settings tab of RDP-Tcp properties window)
Remember to click 'Always prompt for password' and leave the Username field blank, as this will ensure the user still has to login, while providing the domain for them so they do not have to remember to type it in.
Once that is complete, simply click ok, close all your windows and attempt and RDP session and you should see your domain on the login screen!
 (Above: Success! "Log on to: Domain" instead of log on locally!)
Every time you RDP to it, you get presented with the local login, not the domain login!
 (Above: Login screen to the Terminal Server, with a computer name of 'ORION')
So all the users have to type Domain\Username , or username@domain. Which is fine, if they are a little comptuer savvy, however forcing the Terminal Server to logon to the domain first time is much nicer!
So here are the steps to force the RDP session to open with your domain instead of the local machine as the authentication target!
First login to the TS (Terminal Server) with a user with administrative privileges.
Then open Remote Desktop Session Host Configuration:
(Above: Launching the application from the start menu)Once you're in, navigate to the 'RDP-Tcp' connection, located under connections.
 (Above: Remote Desktop Session Host Configuration main screen)
Now right click on RDP-TCP and select properties.
(Above: Right click menu on 'RDP-Tcp')Once the Properties window comes up, navigate to the "Log on Settings" tab.
(Above: General Tab of RDP-Tcp properties window)(Above: Log on Settings tab of RDP-Tcp properties window)This is the page where you can specify your domain, which will force the TS to have "log on to: domain" when the user connects via RDP.
(Above: Filled out Log on Settings tab of RDP-Tcp properties window)Remember to click 'Always prompt for password' and leave the Username field blank, as this will ensure the user still has to login, while providing the domain for them so they do not have to remember to type it in.
Once that is complete, simply click ok, close all your windows and attempt and RDP session and you should see your domain on the login screen!
 (Above: Success! "Log on to: Domain" instead of log on locally!)
And that's it. It just.. works. Well, so I've found at least. :)
Wednesday, June 23, 2010
Windows Server 2008 R2 WSB - Adding Extra Drives
One thing that has changed from Server 2008 to Server 2008 R2 is how you add multiple backup drives to WSB (Windows Server Backup).
In Server 2008 you could simply add a drive, then unplug it and plug the next drive in, and add that drive. You could continue this until you had added all the drives.
However in Server 2008 R2, be it by design or fault, you can no longer do this. If you try you get all the way to the end, added the destination drive and get this wonderful error.
 "The filename, directory name, or volume label syntax is incorrect"
Very descriptive no?
Essentially WSB is trying to contact ALL of the backup drives configured for backup. So because the others are off-line it fails.
So to add multiple drives without having to find 5 USB ports and run all drives simultaneously we need to head over to command prompt and utilize the WBADMIN utility.
We start by using WBADMIN to list all the drives currently attached, as we need to use the Disk Identifier to add the disk.
To get a list up we issue the command WBADMIN GET DISKS . This will list all currently attached drives, mounted or not.


So as you can see the drive we are interested in is the last one. So its as easy as copying the entire Disk Identifier string and putting that into the next command.
Next we use the WBADMIN to add the disk to the backup schedule.
Simply type WBADMIN ENABLE BACKUP -addtarget:
So the Disk ID will be different for you, so paste the ID you copied earlier.

Now we will get two prompts once we execute this command. The first will be asking if we are sure we want to add this drive to the schedule. The Second will be asking if we want to format the disk and add into WSB. We want to say Yes to both of these!

Once both prompts have been accepted it will format the drive, it uses a quick format so it doesn't take too long..

And then if all was successful we are taken back to the command prompt and it should look like this

If you take note of the Label it says, we can verify it was added to WSB by checking for that Label.
And there we have it, another drive successfully added to WSB!
In Server 2008 you could simply add a drive, then unplug it and plug the next drive in, and add that drive. You could continue this until you had added all the drives.
However in Server 2008 R2, be it by design or fault, you can no longer do this. If you try you get all the way to the end, added the destination drive and get this wonderful error.
 "The filename, directory name, or volume label syntax is incorrect"
Very descriptive no?
Essentially WSB is trying to contact ALL of the backup drives configured for backup. So because the others are off-line it fails.
So to add multiple drives without having to find 5 USB ports and run all drives simultaneously we need to head over to command prompt and utilize the WBADMIN utility.
We start by using WBADMIN to list all the drives currently attached, as we need to use the Disk Identifier to add the disk.
To get a list up we issue the command WBADMIN GET DISKS . This will list all currently attached drives, mounted or not.

So as you can see the drive we are interested in is the last one. So its as easy as copying the entire Disk Identifier string and putting that into the next command.
Next we use the WBADMIN to add the disk to the backup schedule.
Simply type WBADMIN ENABLE BACKUP -addtarget:
So the Disk ID will be different for you, so paste the ID you copied earlier.

Now we will get two prompts once we execute this command. The first will be asking if we are sure we want to add this drive to the schedule. The Second will be asking if we want to format the disk and add into WSB. We want to say Yes to both of these!

Once both prompts have been accepted it will format the drive, it uses a quick format so it doesn't take too long..

And then if all was successful we are taken back to the command prompt and it should look like this

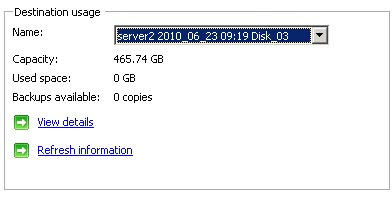
If you take note of the Label it says, we can verify it was added to WSB by checking for that Label.

And there we have it, another drive successfully added to WSB!
Subscribe to:
Posts (Atom)